This blog will provide instructional information on how to add Users to Form2.
Background
Within our school, students will be bulk imported at the beginning of the year. Tutors and Admin are added throughout the year.
Users within Form2 include: students, tutors and admin; the difference will come down to the different roles that are given.
Task 1
- Access Form2 > Adminstraion > User

Task 2
Searching for a User
- To search for a user, Click on any of the small arrows on the top row. For this example, we will use the row ‘Name’.
- Type in the User’s name, this does not need to be the user’s full name, partial will also work.
- Press the ‘Green Tick’ button.
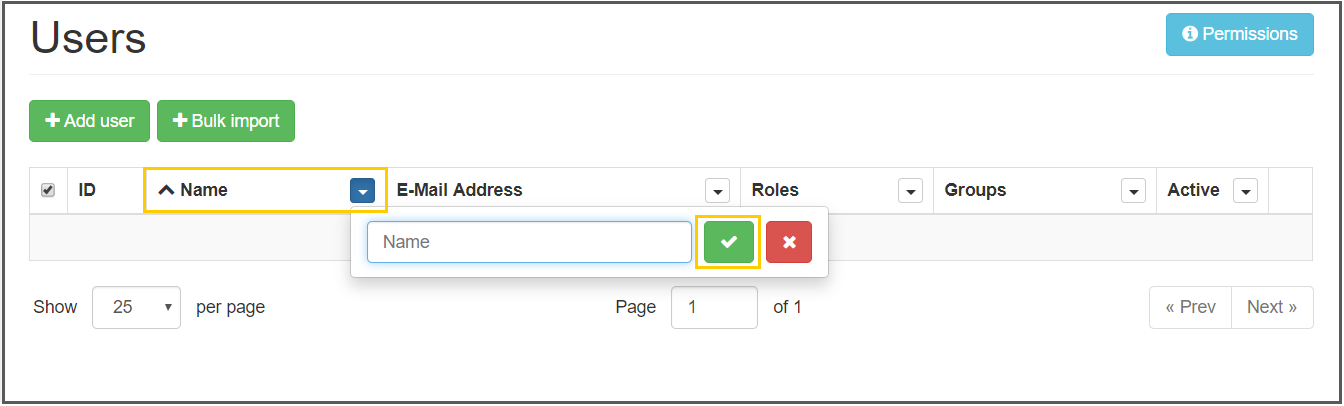
Note: If the User is not there, a “No Matching users” notice will be given.

Task 3
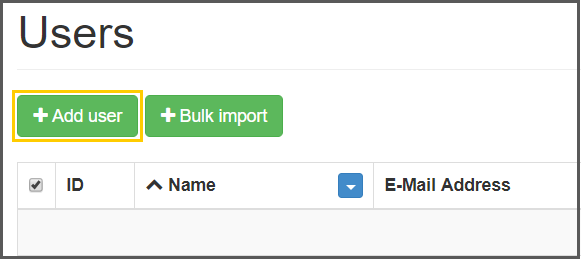
Adding a User.
- Click the ‘+ Add user’ button.
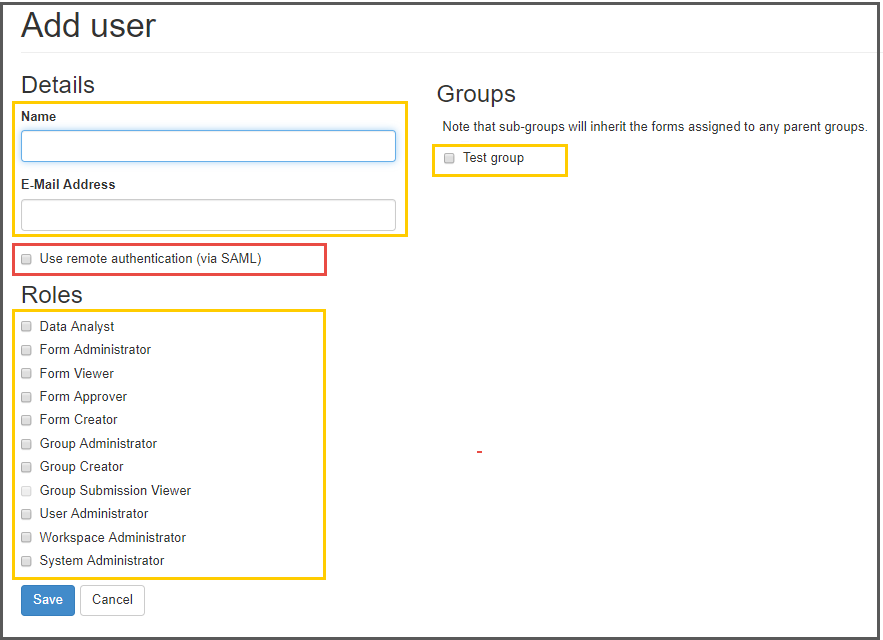
- Complete the user’s name and email address.
- This also needs to be done, if you are setting up a station.
Note: For our school, we use ‘Use remote authentication (via SAML)’, this is part of our single sign-on which allows the User, to use their UoP password and username when logging into Form2.
- Tick the ‘remote authentication (via SAML)’
- If you are setting up a station user, do NOT tick this box.
- Choose the ‘Roles’ required for the user.
- Students will not have any ‘Roles’ assigned to them.
- If you are setting up a station user, they also will not have any ‘Roles’ assigned to them.
Assign a user to a group.
Note: On the left of this page are ‘Groups’, for users to view forms in the Form2 app, they need to be added to a group.
For more information see the blog on, ‘how to create groups’.
- Chose the group.
- Save
Task 4
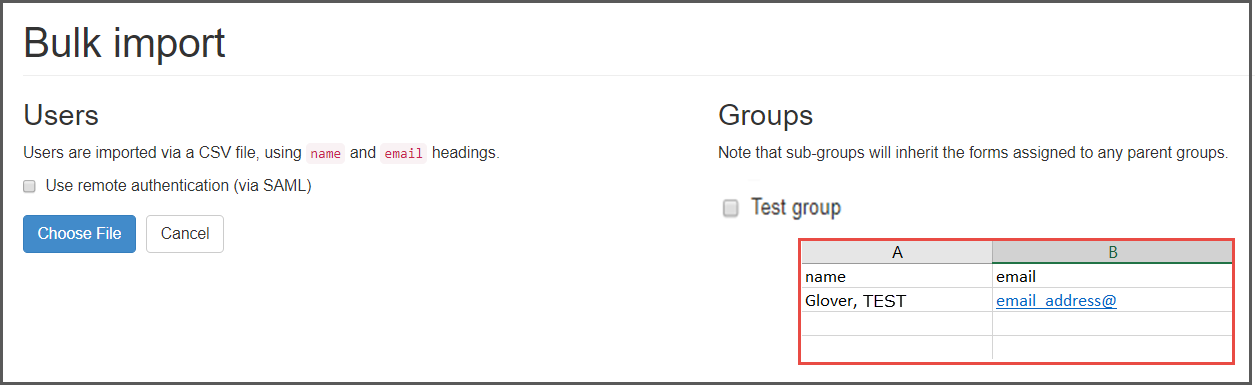
Adding Users through ‘Bulk import’.
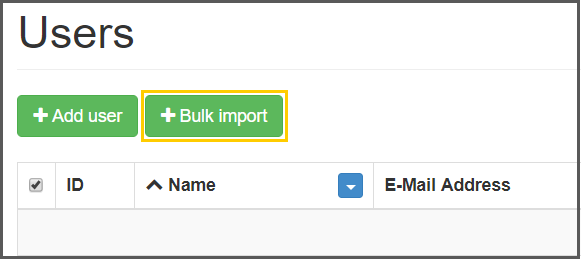
Note: For Bulk import, you will be required to set up a CSV file.
- Create a CSV.
- Open an Excel sheet.
- Place the word ‘name’ in the first column, top row.
- Place the word ‘email’ in the second column, top row.
- Place your users, Name and email address directly underneath the top row, creating a row for each user.
- Save the sheet as CSV
- Select the Group for your users, if you miss this you will need to add a group to each individual user separately.
- Tick the ‘remote authentication (via SAML)’
- Chose your file.
Tip: If you find Form2 is rejecting your CSV form, check for spaces in the cells of the CSV.
Adding a StationUser summary.
- Click the ‘+ Add user’ button.
- Complete the StationUser’s name and email address.
- Do NOT tick ‘remote authentication (via SAML)’.
- Do NOT Choose a ‘Role’.
- Select a group – which should be named ‘StationUser Group’.
- Edit the StationUser’s account.
- Complete the password.
- Save and test the account.
Task 5
Editing a user.
To edit any user, you first need to find the user that requires editing.
- Search and find the user that requires editing.
- Click on the user’s name.

- Click Edit
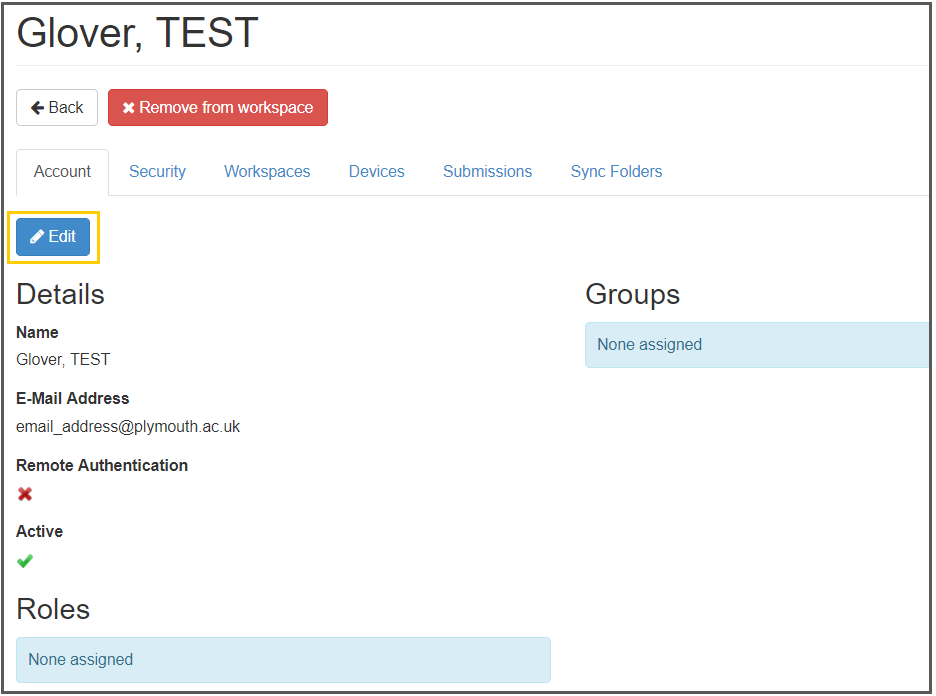
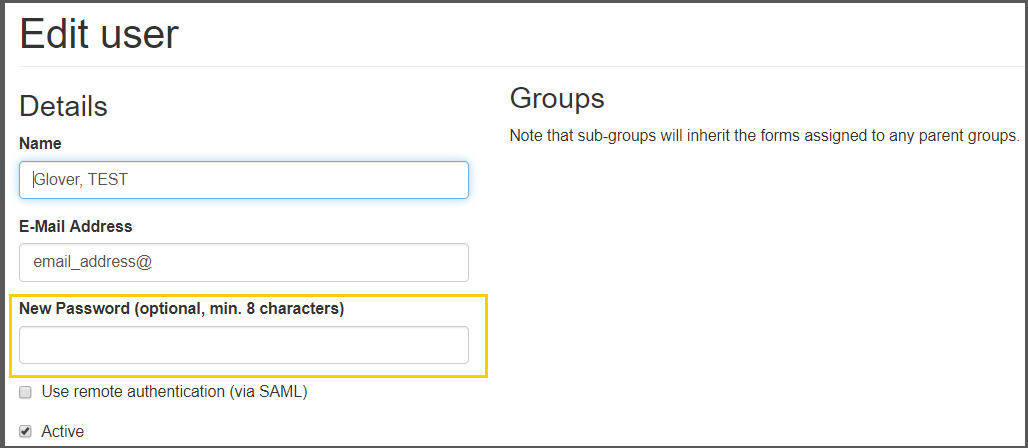
- Edit the user as required
- For station users, you will be required to enter a password here.
Task 6
Deleting a User.
- Search and find the user that requires to be deleted.
- Click the Red box X

Note: Deleting anyone from Form2, will see the loss of their submissions. It will see the loss of any forms or dashboards made by that User.
Within our school, we decided to create a user named after our team and we assigned all our forms to this user, ensure any individuals leaving will not affect Form2 forms, dashboard or submissions.
- Click OK.

Now you have reached the end of this blog, create your own User for your department.
Feel free to share this blog your findings, experience and issue you come across while following it.